Sometimes you are collaborating with someone and want them to have full access to the website you are working on. Perhaps you are a graduate student who has been asked, as part of a fellowship or a work study to create a website for your program, and you want to invite a fellow graduate student or your E.O. as an administrator on the website.
Or perhaps you are teaching an online class using a website on the Academic Commons and want to add your students as contributor to the website, without giving them full administrative access to all of the website.
Here is your step-by-step guide on how to do all of that!
prerequisites
In this tutorial, I assume that you have an account and a website set up on the Commons. If you do not have an account or a website, see Social Media Fellow Chloe Wyma’s “A Beginner’s Guide to Building Your Website on the Commons.”
step 1
logging in to your account
If you are not yet logged into your account, you want to make sure that you are logged in at this point.
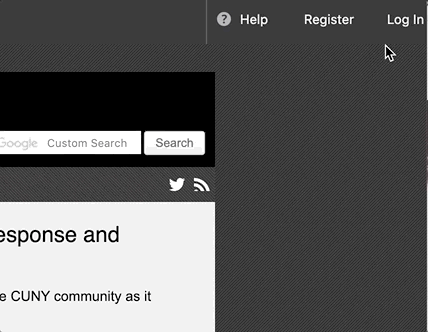
From the upper right corner on the CUNY Academic Commons, log in using your username and your password.
step 2
visit your website’s dashboard
First, navigate to your website. In this example, we are visiting kallewesterling.commons.gc.cuny.edu, but in your case, it will be a different address.
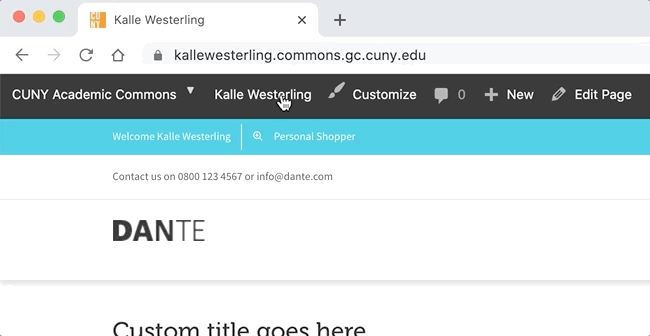
From the top menu bar, select “Dashboard” under the menu that has the name of your website.
step 3
add a new user
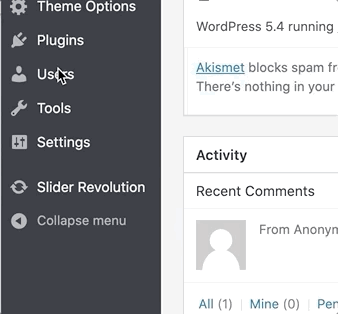
From the left-side menu, hover over “Users,” and click “Add New” in the submenu that appears.
step 4
add by name
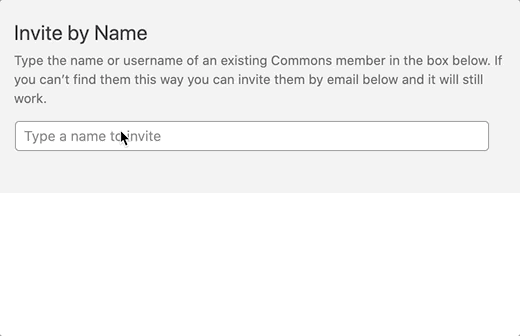
Click the bar with the placeholder text “Type a name to invite” and start typing the name of the person you want to add to the site. Their name should appear and you can go ahead and click it. If they have a common name, keep writing and the system should find the correct user.
Note that this assumes that the person you are trying to add already has a CUNY Academic Commons account.
If they don’t have such an account, you can use the textbox next to Invite by Name, and opt to invite them via their CUNY email addresses.

Once you have found and clicked the right person’s name, click the button that says “Next.”
step 5
assign the correct role
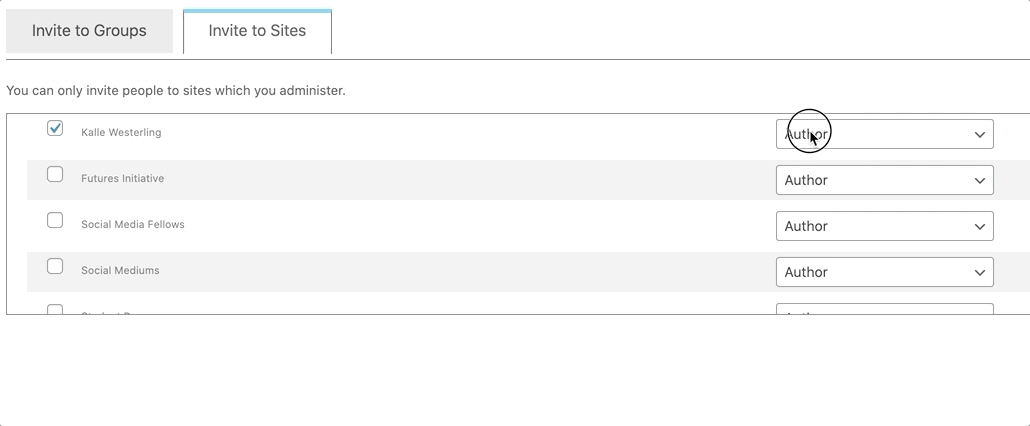
From the popup menu on the right, choose the correct role you want to assign for the person.
If you are adding an E.O. or a collaborator, perhaps you want them to be administrators. If you are adding students, you might want to give them author access to the website. These are the different levels of access to the website that you can assign:
- An administrator has access to all part of the website;
- An editor has access to all of the posts and can add and manage their own and other user’s posts;
- An author can only publish and manage their own posts;
- A contributor can create and write posts, but not make the final decision to publish them;
- A subscriber can only read comments on the site.
Make sure you are assigning the role to the correct site. If you are administrator of several sites, as in the example image above, you can easily accidentally invite the user to other sites. Double check that you have selected the correct role for the correct site before you complete this step.
Once you have added the correct capabilities for the user, once again, click the button that says “Next.”
(optional) step 6
add a welcome message
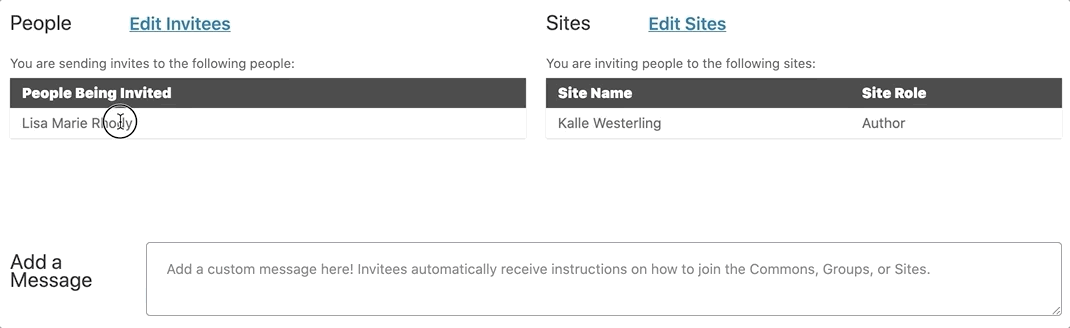
You now have the ability to add a “welcome message” to the user you are inviting. This will be sent to the user along with their invite to become a user on your site.
This step is optional, but remember that the CUNY Academic Commons is a community-building platform and a nice, welcoming message goes a long way.

Once you have added a welcome message (or opted to not do so), click the button that says “Submit.”
You’re done!
You have successfully invited another user to your website. Now, they have to accept your invite and you are ready to roll.